There are many places to be noticed in the renovation of the new house, especially in the kitchen and toilet space. Even if the developer has a waterproof layer, we need to re-do the waterproofing before the renovation, so how to do a good bathroom, etc. What about waterproofing? Let's take a look at the new house bathroom as a waterproof step .
New house bathroom to do waterproof steps 1, preparation tools
Waterproof construction must be prepared before the construction tools and waterproof coating, which tools need to prepare the brush, scraper, roller brush, stirrer, etc., waterproof coating, then not only to choose non-toxic, odorless, environmentally friendly materials, its adhesiveness and waterproof Performance must also choose good job.
New house bathroom to do waterproof steps 2, leveling looking slope
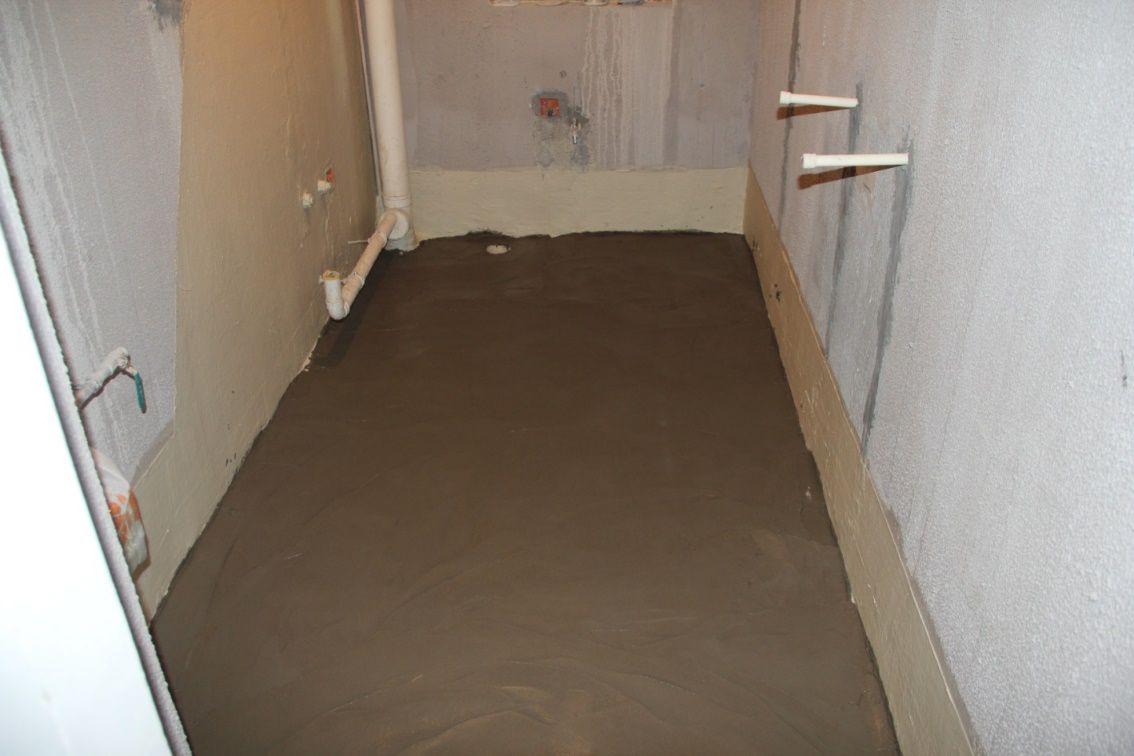
The material is ready. It is necessary to clean the floor of the toilet first. It can be cleaned with the help of brushes, scrapers, shovels, etc. For some raised particles and floating dust, it is necessary to clean it up, and if the grassroots is not smooth. If it is used, there will be uneven thickness in construction and painting of waterproof material, resulting in poor waterproofing, cracking and leakage of the waterproof layer, so the ground needs to be leveled. The base of the bathroom also needs to find the slope, and a certain height difference can make the water flow more convenient.

New house bathroom to do waterproof steps 3, waterproof paint brushing
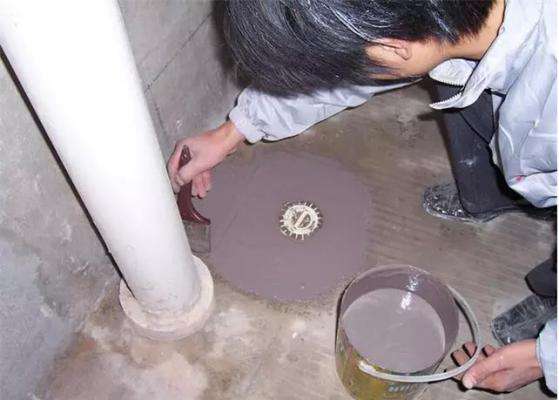
After the grass-roots processing is completed, the waterproof coating can be started. This can be used evenly according to the instructions for use. A lot of waterproof paints must be brushed at least twice and firstly brushed horizontally and then dry vertically. In particular, waterproof coatings such as polyurethane have a waterproof effect of 1.5 mm or more.
When brushing, drains, roots, corners, yin and yang angles, etc., should be painted first. The other areas should be painted first after brushing the facade. The shower area should be painted 180 centimeters. The bathtub should be painted. Up to 30 cm above the bath. The entire waterproof coating is required to be full, without omissions, with a firm bond, without cracks, bubbles, and falling off.
New house bathroom to do waterproof steps 4, shop protective layer
After the construction of the waterproof coating is completed, a protective layer needs to be laid on the surface to prevent the subsequent construction from being damaged, and the protective layer must completely cover the waterproof layer.
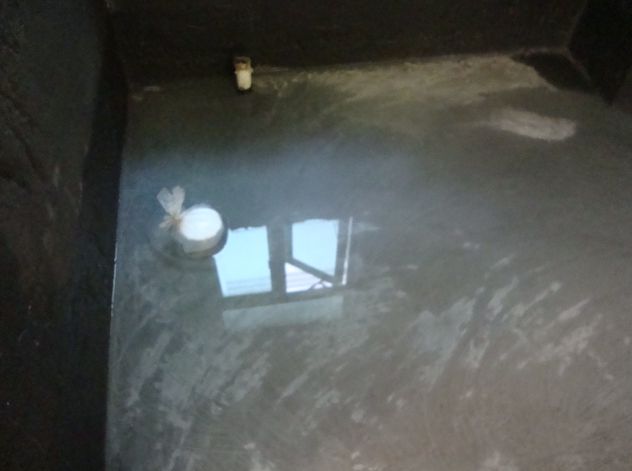
New house bathroom waterproof step 5, closed water test
After the waterproof coating has dried, the water-blocking test can be started for 48 hours and the waterproof effect can be verified. If there is no significant change in the highest point of the water level at 48 hours, it means that there is no leakage. If there is a drop of more than 2 cm, it means that there is leakage, and waterproof shall be done again.
Editor's Note: The above is the introduction of the waterproof steps for the new house bathroom . If you want to do a waterproof measure, every step in the construction must be carried out in strict accordance with the steps, so that there will be no problem. I hope the contents of Xiaobian can give you some references. If you want to learn more about decoration, you can pay attention to our website information.
New house bathroom waterproof steps
The outermost layer of resistance screens is usually a soft screen that connects the internal contacts up and down by pressing. The inner layer contains the oxidized metal of the physical material, namely N-type oxide semiconductor (indium oxide), also known as indium oxide, with an optical transmittance of 80% and the upper and lower layers separated by the middle. ITO is the main material used in both resistive and capacitive touch screens. Their working surface is the ITO coating. The outer layer is pressed by fingertips or any object to make the surface film concave and deformed. According to the leading line number of screen, divide again have 4 line, 5 line and much line, threshold is low, cost is opposite cheap, advantage is not affected by dust, temperature, humidity. Disadvantages are also obvious, the outer screen film is easy to scratch, can not use sharp objects to touch the surface. In general, multi-touch control is not allowed, that is, it can only support a single point. If two or more contacts are pressed at the same time, they cannot be recognized and accurate coordinates can be found. To enlarge a picture on the resistance screen, you can only click "+" several times to make the picture be enlarged step by step. This is the basic technical principle of the resistance screen.
Control by pressure induction. When a finger touches the screen, the two conductive layers are in contact at the touch point and the resistance changes. A signal is generated in both X and Y directions and transmitted to the Touch Screen controller. The controller detects the contact and calculates the position of (X, Y), then works according to the simulated mouse mode. Resistive Touch screen is not afraid of dust, water and dirt, and can work in harsh environments. But because the outer layer of the composite film is made of plastic material, its anti-explosion property is poor, and its service life is affected to some extent.
The resistive Touch screen is controlled by pressure induction. The surface layer is a layer of plastic and the bottom layer is a layer of glass, which can withstand the interference of harsh environmental factors. However, it has poor hand feel and light transmittance, so it is suitable for wearing gloves and occasions that cannot be touched directly by hand.
Resistive Touch Screen
Resistive Touchscreen,Resistive Screen,Resistive Touch,Resistive Touch Panel
Tonya Display Limited , https://www.tydisplay.com